Taking Photos with your Smartphone: Tips & tricks for best results
Almost all the photos on my Instagram account and this website are taken with my iPhone. Although I also own a “real” camera from Canon, but my smartphone is still my favourite, at least when I’m taking photos in town. Why, I’ll explain in this blog post. I also tell you a little bit about how I try to get the most out of my photos, what tricks I use and what additional APPS I work with. Because: You can do it too!
TEXT & PHOTOS: SUSANNE KRIEG
Three good reasons to take pictures with your phone
Of course, the smartphone camera will reach its limits at some point. Especially professional photographers and those who want to become one should invest in a good camera that offers as many individual settings as possible. But even with many smartphones you can get pictures in high, partially poster-ready resolution (an iPhone and the Samsung Galaxy have a 12 megapixel camera built in, the Huawei P20 Pro with built-in Leica lens even shoots up to 40 megapixel photos). But of course, smartphone cameras do not (yet) come close to the quality of the chips, functions and possibilities of professional cameras. Nevertheless, there are three good reasons for me and my personal needs to have my smartphone camera constantly in use – and the following photo sums it up quite well:
1. The smartphone is my constant companion
I doubt that many of my photos, like this picture of the Elbe beach, would have been taken at all if I hadn’t always had my iPhone 6s (yes, it’s that old!) with me everywhere. On top of that, I often ride my bike around town and hate dragging around with me more than really necessary. My smartphone fits in my pocket – and it’s easy to get out if a good motif catches my eye. There are simply zero excuses for not taking pictures (and my output is huge because I have to feed my Instagram gallery every day). On an evening like the one in the Strandperle, I definitely wouldn’t have wanted to take an extra backpack with a big camera with me. After all, it was primarily about sitting in the sand with a few nice people, drinking a beer and looking after the ships.
2. With a smartphone you can take pictures quickly and inconspicuously
I think, people around me rarely feel disturbed when I take out the smartphone for a moment to capture a motif. In contrast, when you suddenly unpack a mega tripod and start handling oven-tube-sized lenses, you can cause much more trouble. Even if I sit in a café or a restaurant and would like to take a picture of my plate, I would probably disturb the other visitors with a clicking monster camera rather than just pulling out my smartphone. Note: The bigger the camera, the more frightening and suspicious the photographer! And: It’s best to mute all sounds on your smartphone too, then you don’t annoy your fellow human beings at all. So the guests at the tables next to me in Café Paris (a great place by the way) may have hardly noticed anything of the photo action, the results of which you can see here:
3. Certain perspectives are easier to handle with a small smartphone
If you want to take pictures from an unusual perspective, you often have to move into uncomfortable positions. In the photo at the Elbe beach my bending over wasn’t really bad, but my smartphone was almost in the sand. I often hang in the famous “Russenhocke” somewhere on a street and my smartphone hangs more or less in the mud, e.g. to capture the reflection of a puddle, as in the next picture of the Große Freiheit on St. Pauli. I would, frankly, have scruples to do that with my Canon. Moreover, in such positions with larger cameras you rarely see exactly what you are actually photographing in the absence of a display (the display was actually one of the reasons why I decided on a Canon 750D, by the way). And your arm also starts to shake quickly when it has to hold a heavy camera from such a position and at the same time somehow the shutter-release button has to be pressed without letting the camera slip onto the wet ground.
For this puddle picture from Peterstraße (Hamburg-Neustadt) my iPhone was also on wet cobblestones and even got a few drops – but it’s not made of sugar, besides I always have it in a protective cover…
How to add the finishing touches to smartphone photos with the right APPS
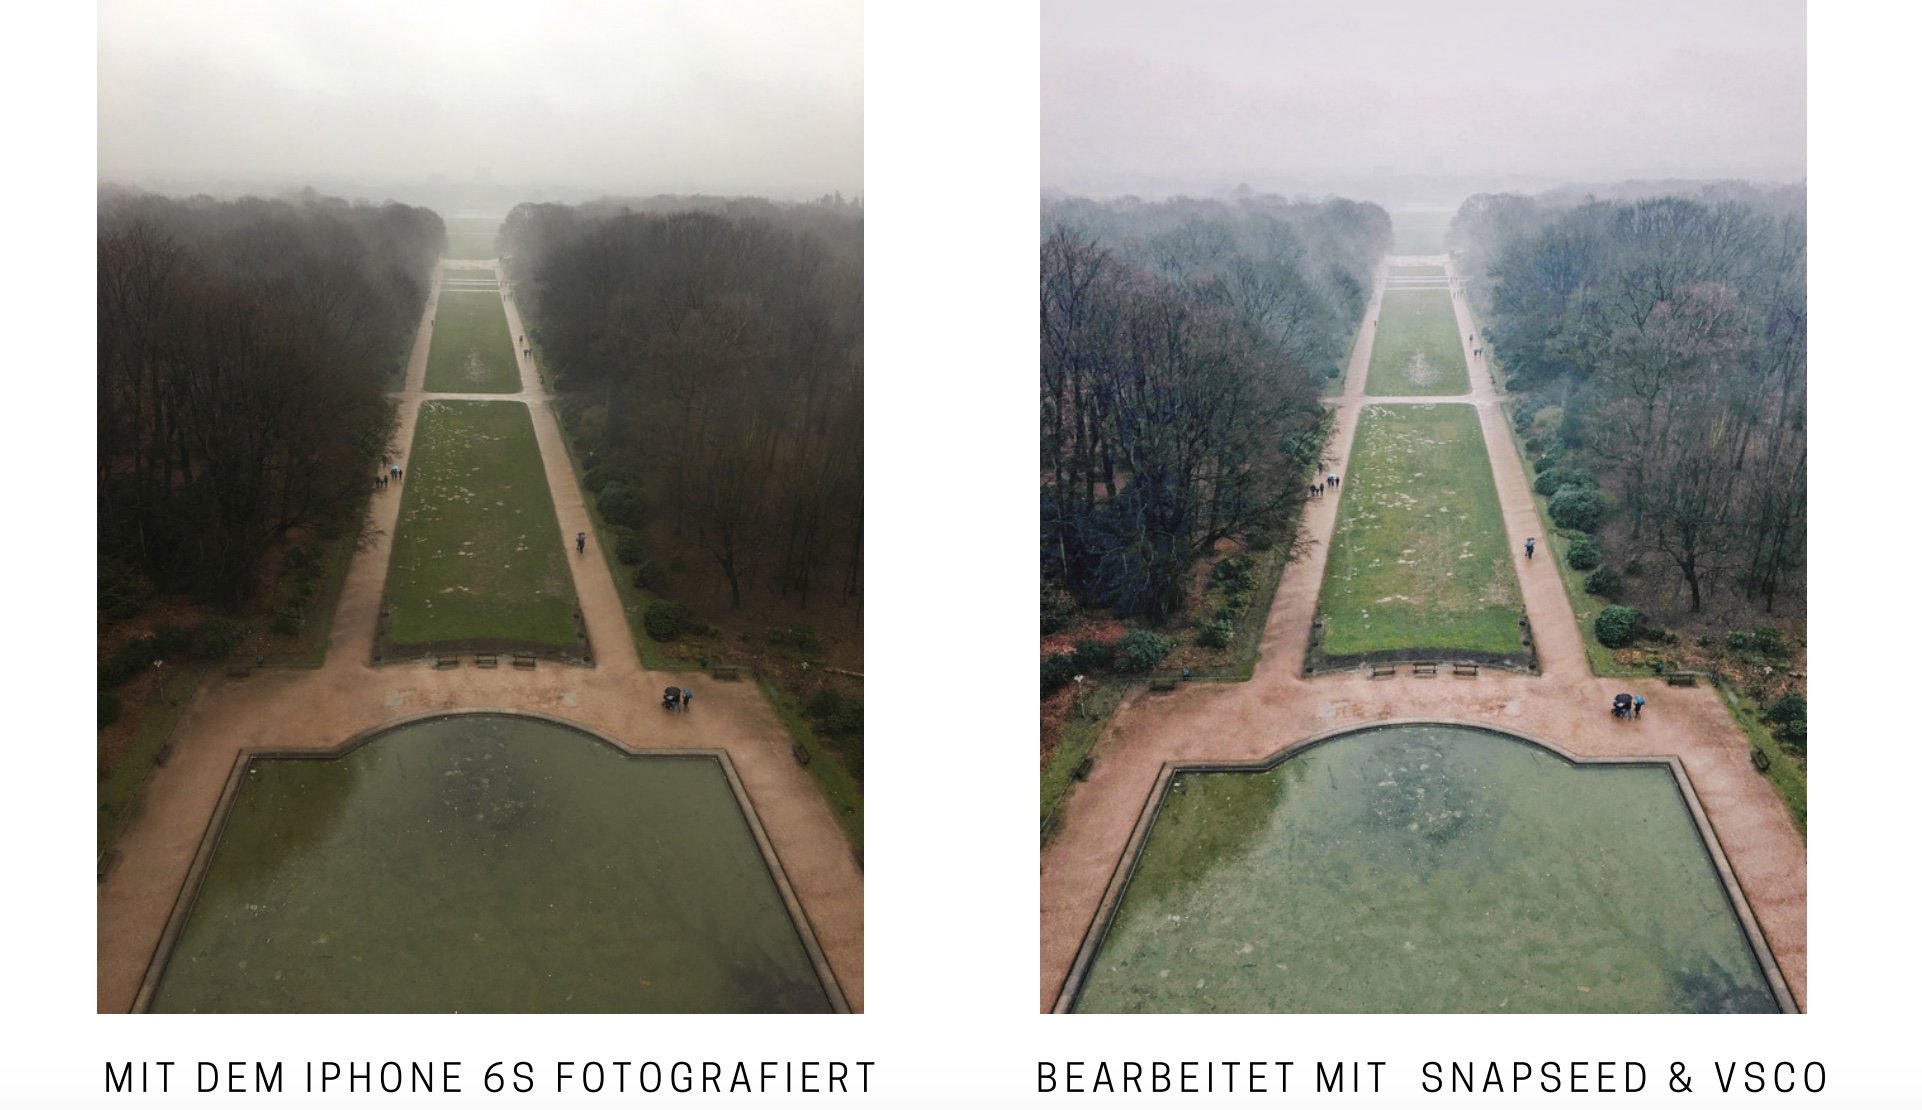
But how do you add the finishing touches to smartphone photos? In a small video tutorial of an older blog post I already showed how I usually work on my pictures (Sorry, it’s only in German). I usually use a “make-up cocktail” of two apps: Snapseed and VSCO (download links see below), now and then I also use Adobe’s Photoshop Fix. The apps mainly serve me to give photos a nicer look, i.e. I improve color values, adjust the cut-out, sharpen and emphasize details. To show how much you can make of a normal smartphone photo, I show the “before” and “after” of a pic from the planetarium in Hamburg’s Stadtpark. With Snapseed I straightened the horizon, brought out the structure, lightened it and took out some warmth. I put a light chromatic filter (C6) by VSCO and added a bit of a vignette. It took me less than 2 minutes – on site. Theoretically, I could have posted it on Instagram immediately.
By the way, this motif is also part of my postcard series “Schietwetter”. But enough self-publicity. I will summarize now what I like most about each of the apps mentioned above:
1. Snapseed
Snapseed is almost always the first app I open for editing: With it I create the basis and choose the right cut-out. It also offers great possibilities to straighten lines and architecture. It can also be used to highlight details. In addition, you can change color and brightness selectively (i.e. only in certain areas of a photo).
Snapseed: free download Google Play / download iTunes Store
2. VSCO
VSCO has some similar features as Snapseed, but less sophisticated. But there are a lot of brilliant filters, which are a lot nicer and finer than those you might have used on Instagram (if you scroll waaay back in my Instagram gallery you can also see photos with Instagram filters… hihihi). I even know professional photographers who love VSCO and its presets, a lot are free, others can be bought for little money. You can also save your own presets to give images a consistent style.
VSCO: download links via Website
3. Adobe’s Photoshop Fix
This app is a slimmed and above all free smartphone version of Adobe’s Photoshop, a software that you have to pay a lot for in the desktop version or subscribe to in the Creative Cloud. With the app you can easily retouch and repair images, experiment with colors and use some other common editing functions.
Photoshop Fix: download Google Play / download im iTunes Store
More tips & tricks for taking pictures with your smartphone
Here are a few recommendations, which do not only refer to smartphone photography, but have a certain general validity when it comes to taking pictures. It’s definitely worth taking a look at these tips – they show that you don’t really need a “big fat” camera to get some nice photo effects.
1. Depht of Field
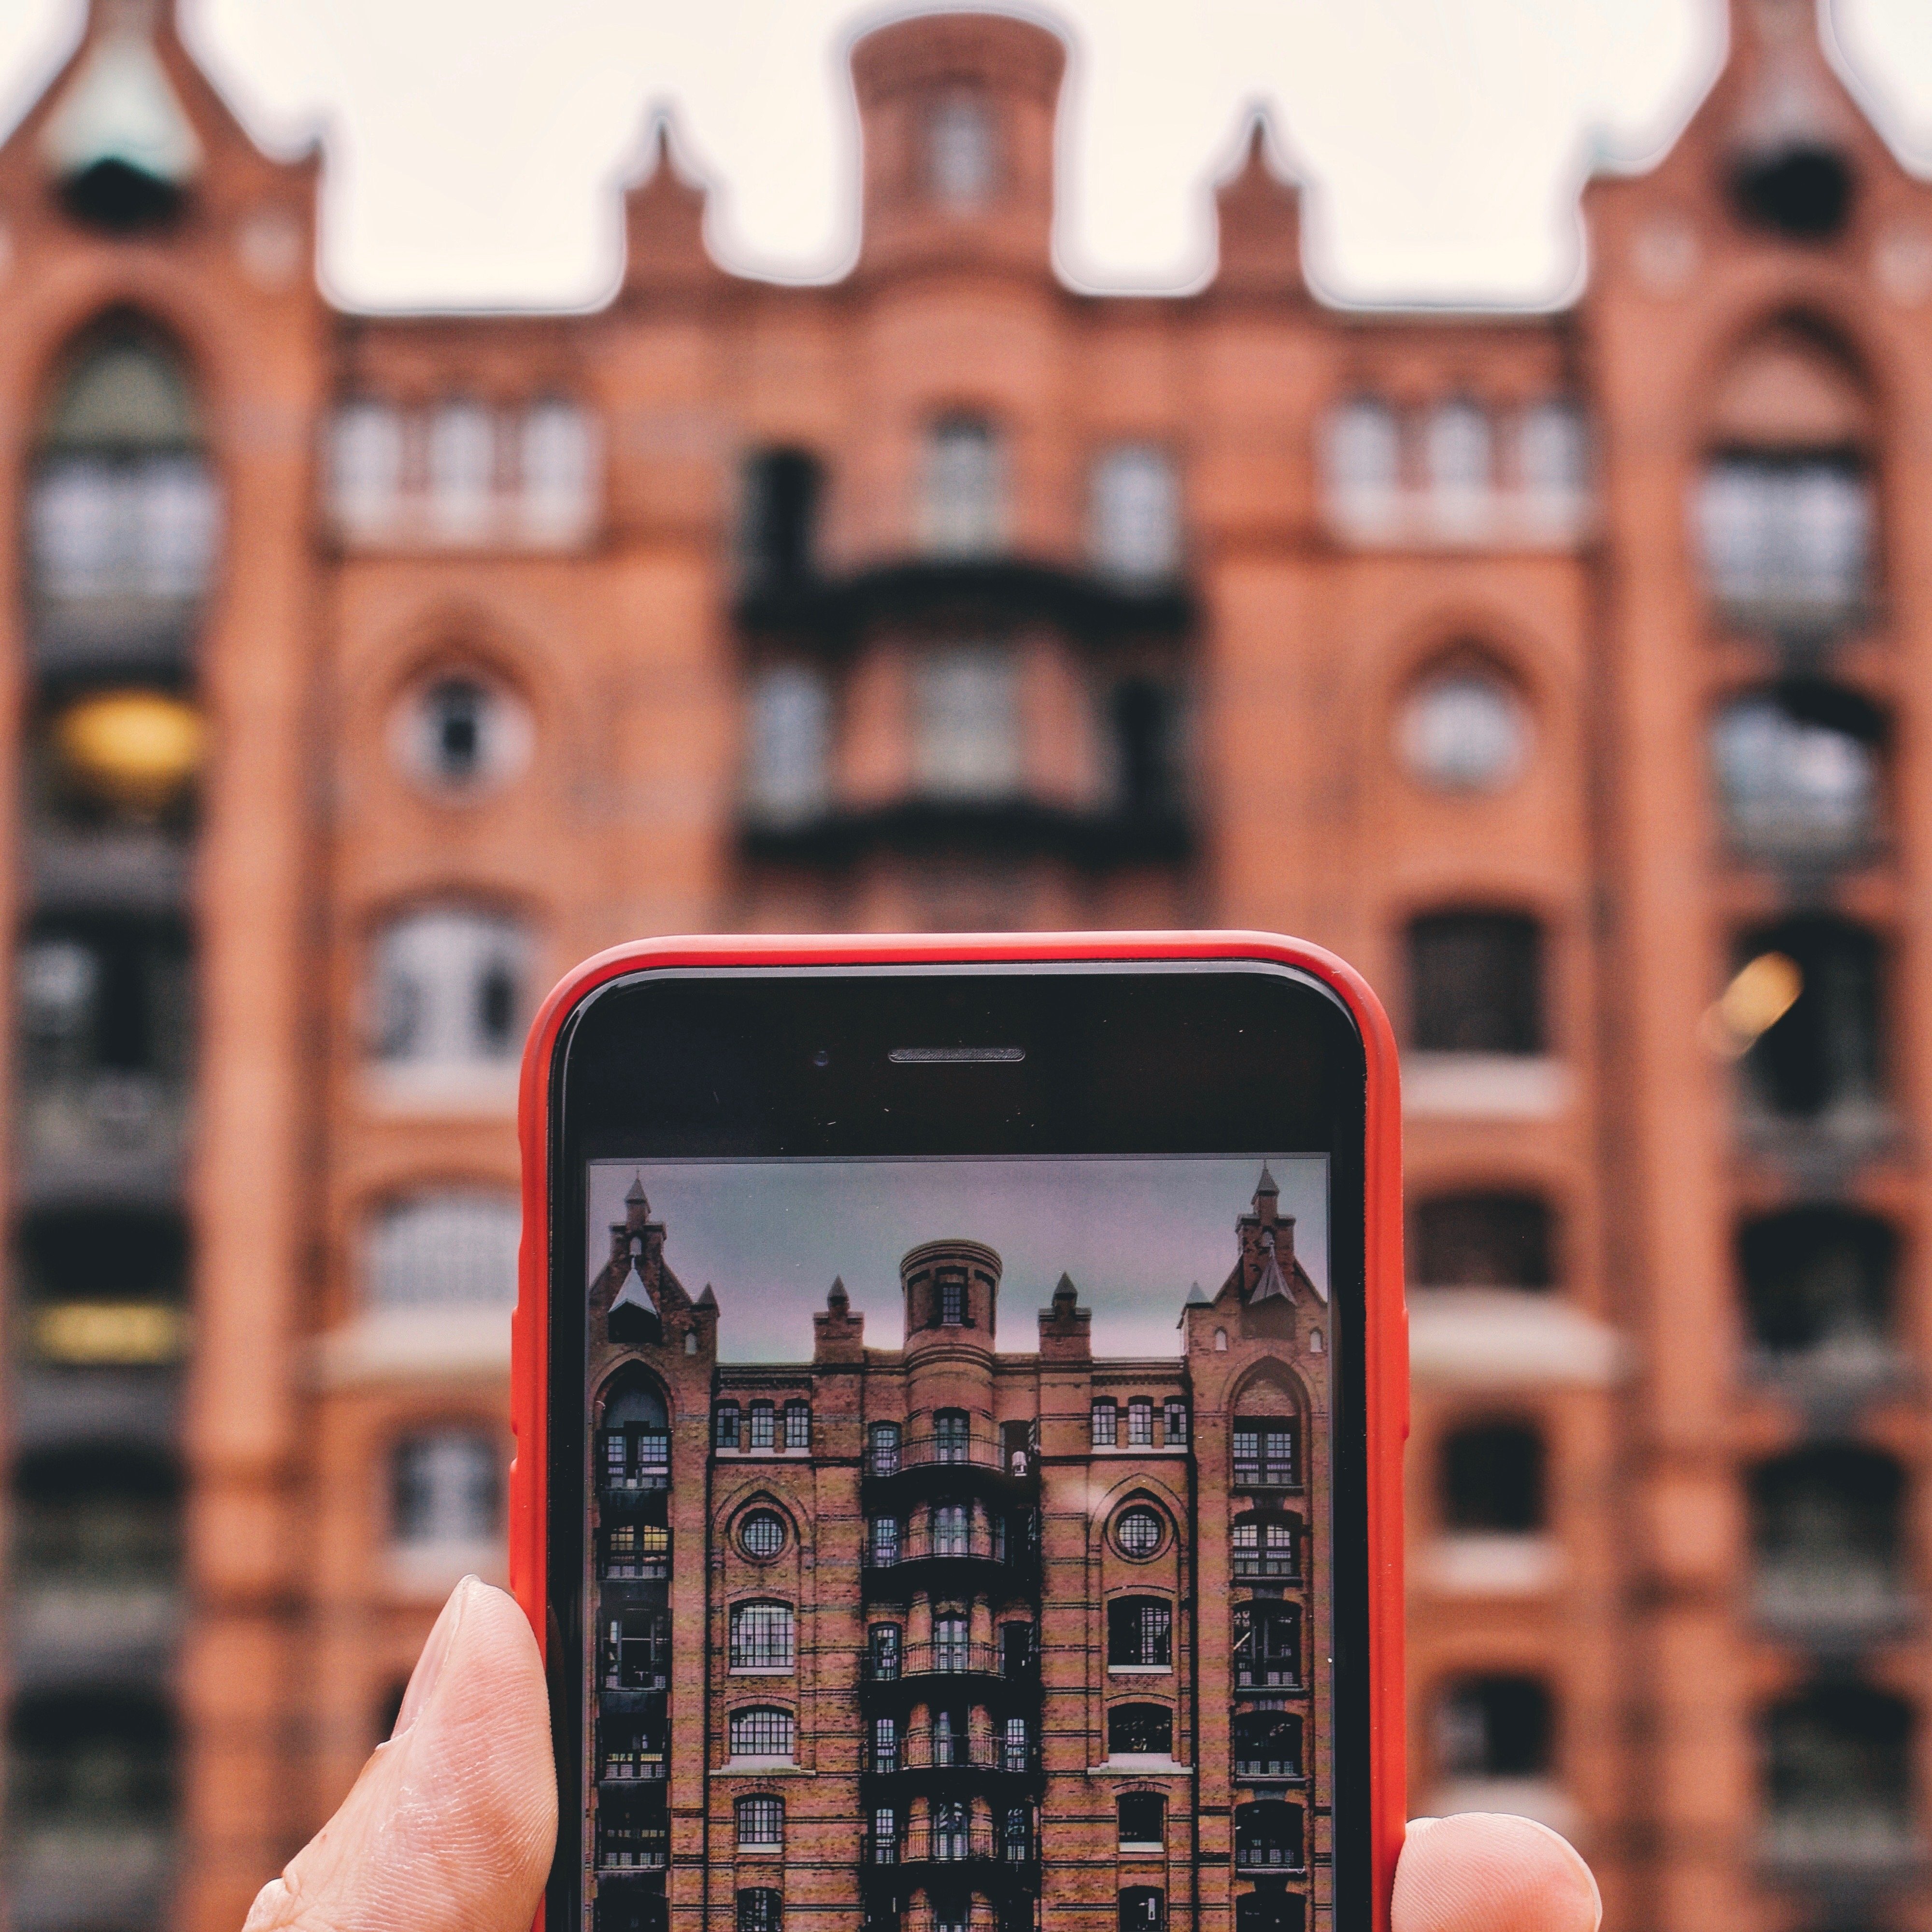
To me it seems that smartphone cameras have almost everything on the photo automatically in a wide focus range. In contrast to SLR cameras, the depth of field control is only possible to a limited extent – but still not an impossibility, as the following photo proves: You have to tap on the object on which the camera is to focus in the display (and, if necessary, lock or freeze it by double-tapping). In this case I tapped on the bee on the thistle, so it sharpened whereas the rest of the image appeared blurry.
When I took the picture of the landing piers, I left the building blurred by tapping on the text of the graffiti on the wall and additionally “freezing” it.
After all, I achieved this effect with an “old” iPhone 6s. The newer iPhones (more precisely, starting from the iPhone 8 plus) come with a dual camera, that Apple promotes as having a special depth of field effect for Selfies and/or in the portrait mode. But I wonder if this effect is really so new and why is it working only in selfies?! As soon as I can afford a new iPhone, I’ll definitely take a closer look.
2. Little Light
Many smartphone cameras like those inside the iPhone get along surprisingly well with little light, as long as there is a light source somewhere. It is important to keep your hand as steady as possible. There is a trick to it: Angle your arms and press them against your body, hold the smartphone with both hands – to stabilize yourself. Of course, you can also use a small tripod and use the connected headphones to trigger the iPhone (to prevent further shaking). With the above mentioned apps you can also edit the recordings. For the following picture of the Alster colonnades, for example, I used a VSCO filter (C6) to make it look softer.
3. Contrast
Sometime I like to play with contrasts and lighting conditions. Here you can also work out the effect afterwards with the above mentioned apps.
4. Symmetry & Leading Lines
Especially on Instagram, symmetric photos look good. And even though we all learned the rule of the golden ratio at school, where photos seem more interesting if you stick to the ratio 2:3, I find absolutely centrally oriented symmetries almost more attractive. The best way to do this is to use the lines in your smartphone camera to help you align your photo.
I’ve gotten used to paying attention to lines everywhere I go – so even in supposedly boring subway stations like Feldstraße quite interesting photos can be taken with the help of light beams that draw beautiful lines on the floor…
5. Straighten Architecture
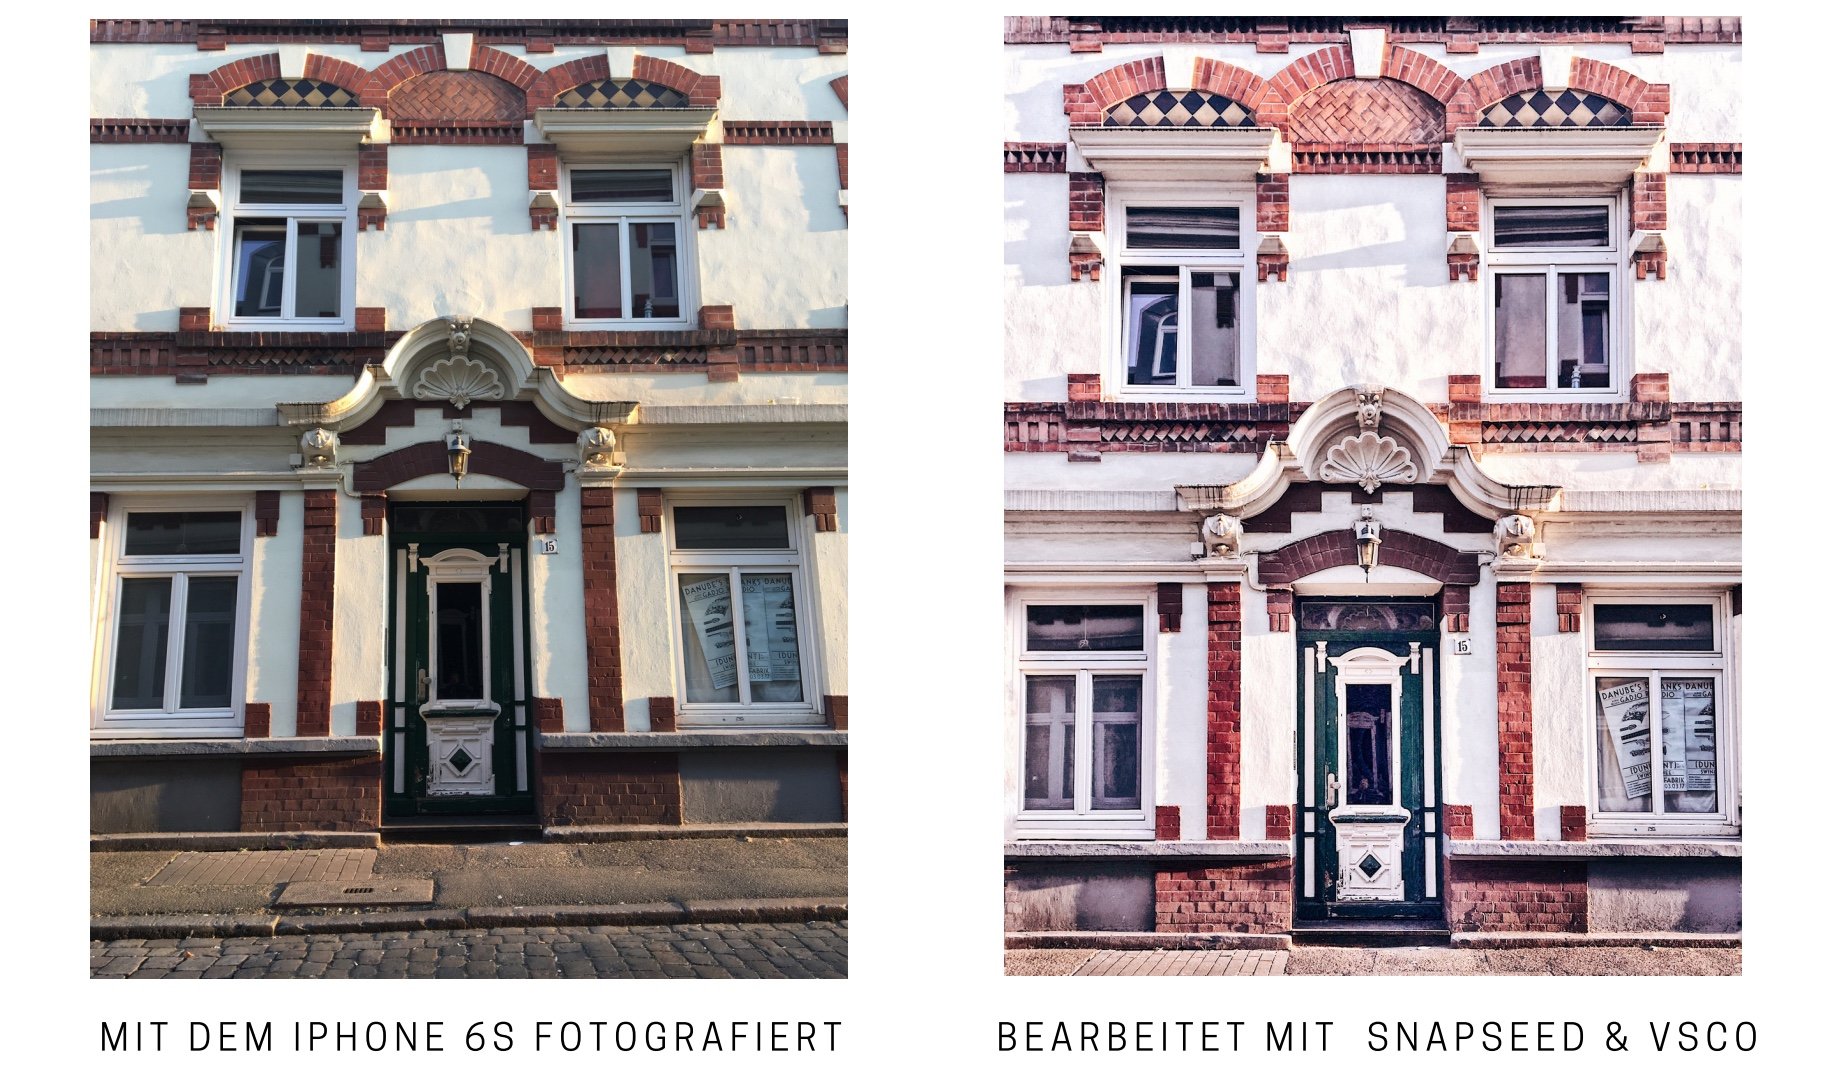
I love to photograph house facades and architecture. But there always is the problem of perspective distortion. With Snapseed you can easily correct the distortion, both horizontally and vertically. Once you’ve practiced it a few times, it will be an easy job. Here you can see an example from Beckstraße (Sternschanze), left before and right after the editing.
One of my favorites among my “straightened” photos is this one from the Speicherstadt…
5. Illustrate Size Proportions
For example, if you want to show huge sprayed on walls or wide landscapes, a special effect is to contrast the expanse of the landscape or the size of a graffiti with a human being or a smaller object. By the way, that’s what also Caspar David Friedrich did with his hiker over the sea of fog!
And now you know why many of my pictures show my red bike. Sometimes it only sets a color contrast, but often enough I use it to illustrate a size ratio.
6. A Foreground makes an Image healthy
Tip no. 5 actually overlaps with this old photographer’s rule: “A Foreground makes an Ikmage healthy”. But I mention it anyway. Especially in the flood of images on Instagram, I often notice photos that show something happening in the foreground. Even if it’s a cheap trick: It always works with me.
… fortunately Hamburg’s Elbphilharmonie has such a characteristic shape that you can still recognize it even in a very blurry state! 😉


